
Kitchen Litho by Sadie Tierney
Kitchen Litho by Sadie Tierney
Introduction
Kitchen Lithography is a planographic printing technique (printing from a flat surface) based on the principle of water and oil repelling each other. French artist Émilie Aizier invented the process in 2011, adapting conventional lithography to the contemporary home setting using household materials, and a simple method (no graining or specialist chemicals). It’s an experimental technique – the best results come from practicing and enjoying the process.
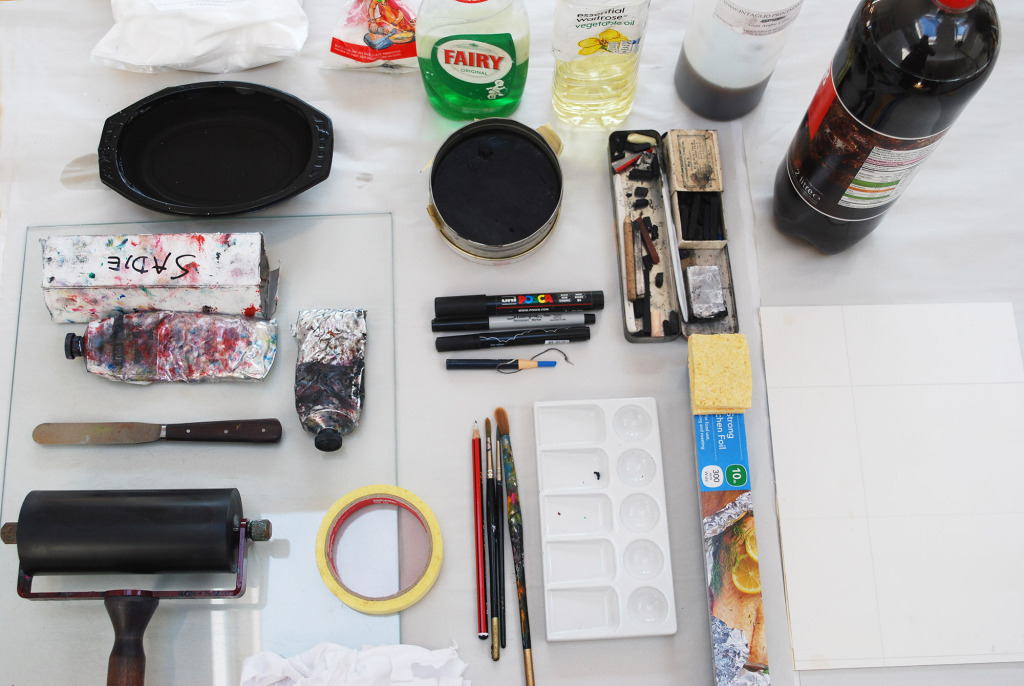
Materials
• aluminium foil
• mount board/ old etching plate/ smooth card
• masking tape/ Sellotape
• newsprint
• oil-based paint/ litho crayons/ soap/ Sharpie pen /oil bar/Chinagraph pencil /brushes
• clean cotton rags
• cola (containing phosphoric acid)
• vegetable oil
• clean sponge
• roller
• glass for inking (I’m using an old fridge shelf)
• oil based printing ink (litho/lino/etching)
• paper for printing (smooth works best)
• metal/wooden spoon or etching press
• optional: gum Arabic
• rags, 1/3 vegetable oil 1/3 washing up liquid 1/3 water – mixed together for cleaning up.
Method
Making the plate
Tear off a sheet of tin foil and lay it shiny side up on a very clean sheet of paper. Place a piece of mount board or old etching plate in the centre. Fold the sides over (this will be the back of the plate). Tape in place. Turn over, making sure to not touch the front (the matte side).
Drawing the plate
Draw with oil based media, Sharpie pen or oily soap. Any oil marks will print, including finger prints. Tip – use a hair drier to speed up the drying of the plate.
Processing the plate
Once you’re happy with the image, pour cola across the plate from both directions into a sink or container (you can reuse the cola for other plates made at the same time). Pour water over the plate to wash the cola off. Using a rag, clean the plate with vegetable oil. Roll up some oil based printing ink.
Inking the plate
Using a clean sponge and clean water (not too wet) damp the plate. Roll a thin layer of ink onto the plate (it should not be “hissing”). Damp the plate again with the sponge. Roll again thinly. Repeat until a visible ink film appears on the surface of the plate. Tip- If the white areas of the plate fill with ink, wipe the area with cola. (There’s a few reasons why the plate may scum up during printing: 1. Over inking – the ink is too thick on your roller. 2. The plate dries out during inking. 3. The sponge water is too alkaline)
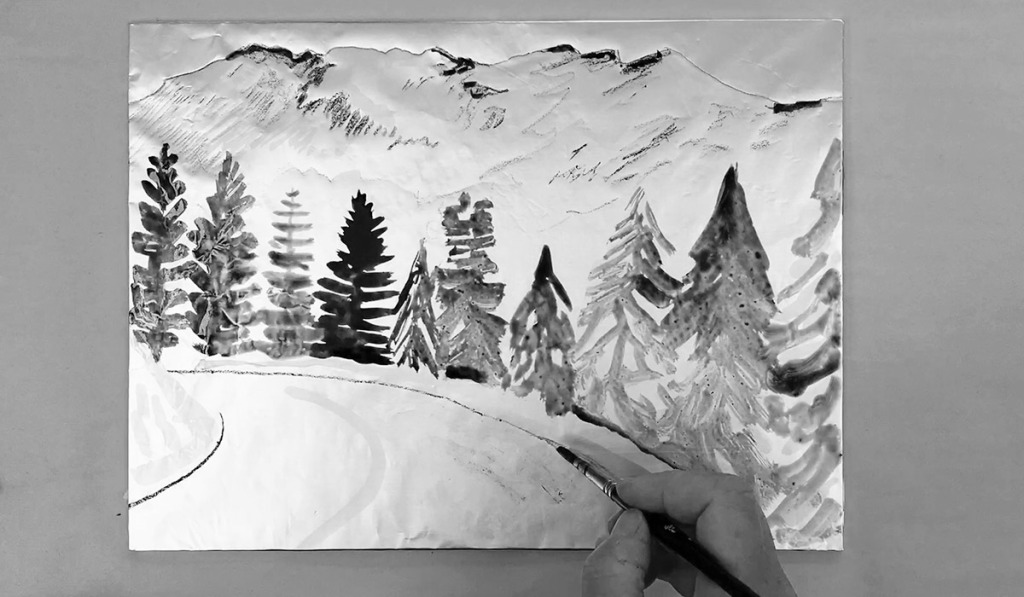
Printing
Once the plate is inked, give it a final wipe with the damp sponge. Lay the plate image up onto the press or on a flat work top. Position your printing paper carefully on top of the image. Cover with newsprint. Roll through an etching press or use a spoon to print by hand as demonstrated (tip- if spoon printing, substitute newsprint for greaseproof paper).
To make more prints, repeat the inking and wiping process. If you are careful and the foil remains in tact you could pull 100 prints from the plate.
Cleaning
Roll over the lino surface of your stamp until it has a good even coating of ink. If there are any Once you’ve finished clean the equipment using rags and 1/3 Vegetable oil 1/3 washing up liquid 1/3 water mixed together. Apply gum Arabic to the cleaned printing plate, and reactivate with cola for further printing- or recycle if you’ve finished.
Further Suggestions and Resources
Make individual plates to print in separate colours and build up a multilayered print. For registration, cover a sheet of thin paper in chalk and draw your image through the back onto the plate so that the chalk lines transfer onto each plate.
When my children were small, this process enabled me to make plates safely and print them in my kitchen while they napped. My multilayered Kitchen Litho ‘Tour D’Eiffel’ was accepted to the RA Summer Exhibition in 2014.
-
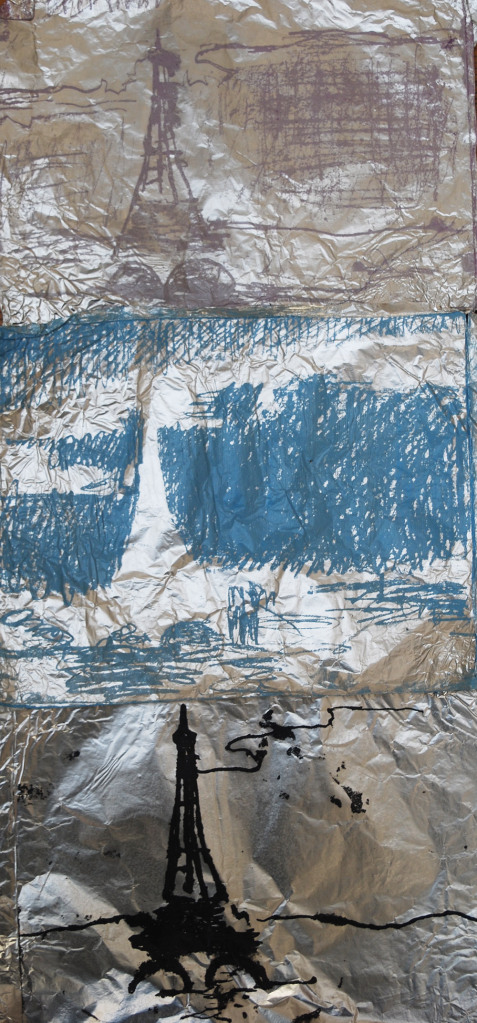
Plates -
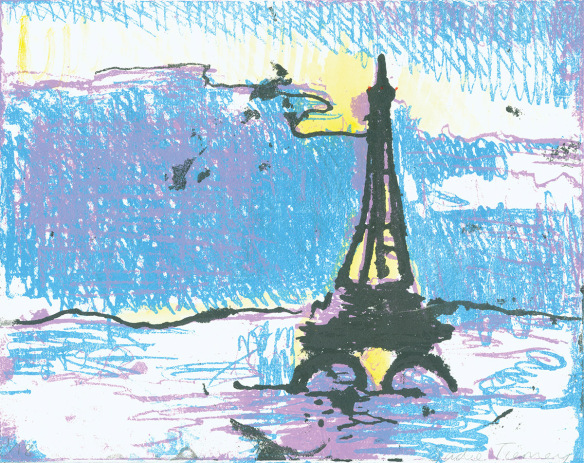
‘Tour D’Eiffel’ print
One of the great things about printmaking is the generosity of sharing knowledge.
I’m indebted to Émilie Aizier, the inventor of this wonderful egalitarian process, sharing her innovative technique, sample prints and ideas for free via her website and YouTube channel: https://m.youtube.com/watch?v=G2w0IFm7JOY
Émilie Aizier curates a biennial exhibition, here’s a print I made for her last exhibition in 2018: https://www.atelier-kitchen-print.org/gallery/sadie-tierney/